 When a vocal recording sounds muffled, like the singer/speaker has a box over his/her head, that’s usually NOT what we want. So what do we do about muffled vocals? In other words, how do we improve voice clarity?
If we can prevent the sound of muffled vocals to begin with, that would be ideal. You can get that vocal clarity by making sure you record with a decent microphone in a decent space.
For example, one thing you should NOT do is record in a closet. People often use closets as make-shift vocal booths, but unless you really know what you’re doing, you’ll just end up making your voice sound “boxy” and muffled.
Use the right microphone?
This can be caused by a number of different things, such as not using the correct mic for the singer (yes, some mics that sound awesome on one person may not sound good on someone else).
Generally speaking, the best kind of microphone for recording clear sounding vocals is a large-diaphragm condenser microphone. One good example of an excellent large diaphragm condenser mic is an Audio-Technica AT2035. You can find my review of that mic here: Review of the Audio-Technica AT2035 Microphone.
The wrong mic
Sometimes, you get a muffled vocal sound by using a common live-performance mic like a Shure SM58. That is a great mic for live stuff, but usually not so great for recording.
Don’t record with effects
Do not apply effects while you are recording! Some people you plug the mic into a “channel strip” or other piece of hardware to apply effects (EQ, reverb, tube emulation, mic modeling, to name a few). Don’t do this, or you will be stuck with those effects in the recording. If you find that one or more of these recorded effects is causing the voice to sound muffled, then there isn’t much you can do.
If you want to apply effects to your vocals, do it AFTER you have the clean voice recorded so you can adjust after the fact.
What to do if the vocal is already recorded?
How can you improve vocal clarity in a vocal recording? When recorded vocals sound muffled, it’s usually because there is too much energy in the lower frequencies. For a really good quick lesson on what a frequency is, see our post: Good Equalization and Frequency Basics.
You can use a tool called EQ (short for equalization) to clean things up. Before we talk about how to do that though, take a look at the video below from the article I mentioned above:
Using EQ to improve voice clarity
Now that you know what I mean when I talk about frequencies, you’ll understand when I say that muffled vocals usually have too much bass and/or low-mid frequencies. So with an EQ effect (in Reaper, I just put the built-in ReaEQ onto the voice track), start by filtering out frequencies below 80Hz. You might even try 100Hz.
Next, reduce (turn down) frequencies in the range between 140Hz and 400Hz. Turn that down by about 3-5 dB to start. That should do the trick.
I don’t normally recommend adding (turning up the volume) energy anywhere on the EQ to fix a problem since that can cause more problems than it fixes. Reducing is regarded as being much more effective and usually does the trick. But if those reductions don’t get you the clarity you want, CAREFULLY experiment with increasing some of the higher frequencies.
Try a small boost (start with 3dB) those in the 1-3 KHz area first. Humans are particularly sensitive to sound in this frequency range, so a small bump can help clear up a voice.
Another range to try boosting is the 9-10 KHz area. This can add a bit of sparkle or air to a voice.
Let’s review
If your vocals sound muffled in your recordings, you can fix this by:
- Preventing the muffled sound by recording without effects, in an open space (i.e. NOT a closet) with a good microphone, and
- If the voice is already recorded, apply some EQ to the vocal track. Just reducing the low and low-mid frequencies should do the trick. But if not, try boosting just a touch in a few of the higher frequencies.

 Equalization, or EQ for short, is a fundamental concept in audio recording, live sound, or simply listening to audio. For a primer on what it is, see our article
  Here are some stocking-stuffer ideas for home recording enthusiasts – small but awesome pieces of audio recording equipment that will definitely put a smile on the face of anyone who works with audio, home studio or not. Check out these ideas for Christmas Morning smiles:


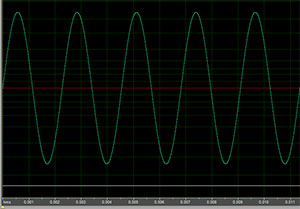 Phase is a pretty importance concept in audio recording. It affects how different sounds – like instruments, voices, etc. interact with one another. It also affects how the same wave interacts with other versions of itself, created by delay effects or by room reflections when it comes out of a speaker and bounces off the walls and ceilings.
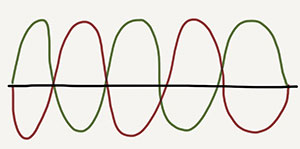 Phase is about the relationship between two or more waves. So if we had an exact duplicate of the above wave playing at the same time, they would be in phase, and the amplitude (how high or low the wave is) would be doubled. If this same duplicate wave were moved in time, however, by just the right amount (that is the red one in the lower picture to the left), then the two waves would be completely out of phase with one another and the amplitudes would cancel each other out. Of course any difference in timing between these two identical waves would be considered out-of-phase (just not “completely” our of phase) and some cancellation would still happen.