 If you’ve been a regular reader of this blog, then hopefully you know that your computer is an excellent home recording studio, an you can record professional voice-overs (as well as music and any other audio recording projects) right from home. If you are one of the many voice-over actors on our list who daily answer voice casting auditions at Voices.com (or anywhere else), you probably also know that you have to be persistent. I’ve found that as with any acting job, you have to do lots and lots of auditions for every job you land. To quote Tom Hanks from the movie A League of Their Own, “It’s the ‘hard’ that makes it good.” But that doesn’t mean you can’t improve the odds. It is helpful to know that certain kinds of auditions get immediately thrown out by a client. Of course, it would also help if those weren’t yours.
Why I (as a voice-talent hiring client) toss auditions
1. Non-custom audition
As someone who has both auditioned AND hired voice talent from Voices.com, I can tell you one thing for certain – sending demo reels with recordings that don’t answer the specific need of the client is one way to get your audition ignored completely. When, as a client, I say in the job description something like “I need a celebrity impersonation of President Obama,” and one of the auditions is a demo reel of cartoon voices and car commercials, I click the Stop button immediately and move on. Just take the extra time and record something that the client actually asked for. It’s fine to send a demo that you already have if it matches the client’s description, or if they don’t really give a description. Otherwise, leave the demo reel for your profile page or promo kit.
2. Poor recording quality
Another thing that causes auditions to get set aside is a poor quality recording. See our tips here for getting the best recording possible regardless of what gear you use (that series of articles also tells you all about the gear!) – How to Build a Home Recording Studio: Part 2 – Four Tips For Preventing Noise . It is so inexpensive, gear-wise these days, that there is really no excuse not to spring for the $75 or so for a decent USB mic at the very least – if you’re serious about making the voice-over thing into regular paying gig.
If you have the gear, but are just not happy with the quality of your sound, or time it takes to record demos and jobs, you can learn to fix both problems in our new home recording video tutorial course. Check it out here: The Newbies Guide to Audio Recording Awesomeness 2.
So now you know how not to have your auditions immediately thrown onto the garbage heap. If you’re keeping track of how often you land a voice-over gig, this should improve your job-to-audition ratio greatly.
Good luck!
For another take on why voice-over auditions get chucked, check out this article by Derek Chappell: http://thevoiceofyourbusiness.com/blog/2012/09/27/why-do-95-of-demos-get-tossed/
 This is part 2 in a series called
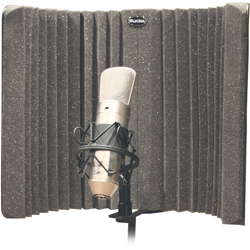

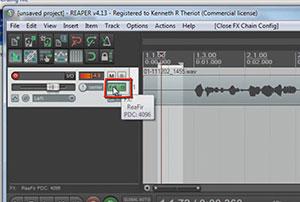
 So see it in action in the video above. But here is is a written summary of how it works. Once you have recorded some audio onto a track, click the FX button in the track control panel. Then select VST: ReaFIR from the Cockos collection of FX plug-ins.
 Whether you are recording your own music or working with a music file that already exists (usually a royalty free music clip for background music), there are many times when it is useful to cut, copy, and maybe paste sections of a song. Here are just a few of the more common reasons for needing to do that, just off the top of my head:
 When working with music files, it is important that any edits you make do not mess with the timing. Otherwise it will be jarring to the listener. If you want to slice up a song, say, to make it fit a video, you want it to sound seamless in terms of the beat of the song. One excellent tool for doing this is the snap tool. This is a pretty common tool for editing both audio and video. In the picture on the left is where to find the tool in Reaper.
 The idea of snapping is simple enough. It is a way to ensure the edges of an item can only be be moved and placed so that they align with a grid. In the case of audio, that grid is frequently bars and beats, though you can change the grid to be other things, like minutes and seconds, etc. For our purposes in this article, we want to make sure we use bars and beats. In Reaper (see picture on the left), simply right-mouse click in the band across the top of the screen to change the grid settings.
 ake sure you line it up just right. Again, the snap tool needs to be ON at this point.
 5. Now drag the left edge of the section with the guitar buzz in it to the right, creating a blank space where you will insert the part you are pasting. Things should now look like the picture to the left.